Showing posts with label Daring Bakers. Show all posts

June 27, 2010

June Daring Bakers: Chocolate Pavlova with Chocolate "Mascarpone" Mousse


The June 2010 Daring Bakers’ challenge was hosted by Dawn of Doable and Delicious. Dawn challenged the Daring Bakers’ to make Chocolate Pavlovas and Chocolate Mascarpone Mousse. The challenge recipe is based on a recipe from the book Chocolate Epiphany by Francois Payard.

A pavlova is a meringue dessert, named after the Russian ballerina, Anna Pavolva. In Europe and America, it's usually a crispy piped or flat meringue, topped with cream and fruit. In Australia and New Zealand, it's a meringue cake, tall and crispy on the outside and marshmallowey on the inside.

This one sounds like a chocolate mouthful, and it was! I decided to make this challenge extra challenging by removing all dairy from the recipe. I wanted to serve it on Father's Day, and we were having chicken for dinner. Also, my father-in-law tries not to eat too much dairy nowadays, so I scoured the internew for vegan mascarpone recipes. I ended up using a combination of the recipes I found and mixed it with the Daring Bakers mousse recipe. The result? AH.MAZ.ING.

The mousse was rich, thick and deeply chocolatey...you couldn't even tell it was non-dairy. The chocolate pavlova was light and crispy, yet still rich and delicious. Topped with strawberries, well, this was a winner. My father-in-law said it was one of the best desserts I've made, and he loves a lot of my baked goods!

Chocolate Pavolva with Chocolate "Mascarpone" Mousse

Recipe 1
Chocolate Meringue (for the chocolate Pavlova):
3 large egg whites
½ cup plus 1 tbsp (110 grams) white granulated sugar
¼ cup (30 grams) confectioner’s (icing) sugar
1/3 cup (30 grams) cocoa powder

Instructions:
1.Place a rack in the center of the oven and preheat to 200º F (95º C) degrees. Line two baking sheets with silpat or parchment and set aside.

2.Put the egg whites in a bowl and whip until soft peaks form. Increase speed to high and gradually add granulated sugar about 1 tbsp at a time until stiff peaks form. (The whites should be firm but moist.)

3.Sift the confectioner’s sugar and cocoa powder over the egg whites and fold the dry ingredients into the white. (This looks like it will not happen. Fold gently and it will eventually come together.)

4.Fill a pastry bag with the meringue. Pipe the meringue into whatever shapes you desire. Alternatively, you could just free form your shapes and level them a bit with the back of a spoon.

5.Bake for 2-3 hours until the meringues become dry and crisp. Cool and store in an airtight container for up to 3 days.

Recipe 2
Chocolate Mascarpone Mousse (original DB recipe, dairy)
1 ½ cups (355 mls) heavy cream (cream with a milk fat content of between 36 and 40 percent)
grated zest of 1 average sized lemon
9 ounces (255 grams) 72% chocolate, chopped
1 2/3 cups (390 mls) mascarpone
pinch of nutmeg
2 tbsp (30 mls) Grand Marnier (or orange juice)

Instructions:
1.Put ½ cup (120 mls) of the heavy cream and the lemon zest in a saucepan over medium high heat. Once warm, add the chocolate and whisk until melted and smooth. Transfer the mixture to a bowl and let sit at room temperature until cool.

2.Place the mascarpone, the remaining cup of cream and nutmeg in a bowl. Whip on low for a minute until the mascarpone is loose. Add the Grand Marnier and whip on medium speed until it holds soft peaks. (DO NOT OVERBEAT AS THE MASCARPONE WILL BREAK.)

3.Mix about ¼ of the mascarpone mixture into the chocolate to lighten. Fold in the remaining mascarpone until well incorporated. Fill a pastry bag with the mousse. Again, you could just free form mousse on top of the pavlova.

My Recipe - Vegan Mascarpone
this recipe was very much "to taste." I used the base of the recipe I found online, and tweaked it with the DB recipe, using chocolate, powdered sugar, and vanilla extract until I liked the taste.
8 oz Soy Cream Cheese (I used toffuti's vegan cream cheese)
1/4 cup soy sour cream (I used toffuti's vegan sour cream)
1/3-1/2 cup powdered sugar (do this to taste)
9-10 oz. non-dairy (pareve) chocolate chips/chunks
1/2 cup Silk non-dairy creamer

1. Heat the creamer on the stove, and once it's warm, stir in chocolate. Whisk until smooth. Set aside in a bowl and allow to cool to room temperature.

2. Beat soy cream cheese, sour cream and powdered sugar together.

3. Fold in cooled chocolate. It may seem slightly runny at this point. Chill in the fridge for 2-3 hours until it's firm. Stealing spoonfuls to "taste test" is highly encouraged.

Recipe 3
Mascarpone Cream (for drizzling):
1 recipe crème anglaise
½ cup (120 mls) mascarpone
2 tbsp (30 mls) Sambucca (optional)
½ cup (120 mls) heavy cream

Instructions:
1.Prepare the crème anglaise. Slowly whisk in the mascarpone and the Sambucca and let the mixture cool. Put the cream in a bowl and beat with electric mixer until very soft peaks are formed. Fold the cream into the mascarpone mixture.

Recipe 4:
Crème Anglaise (a component of the Mascarpone Cream above):
1 cup (235 mls) whole milk
1 cup (235 mls) heavy cream
1 vanilla bean, split or 1 tsp pure vanilla extract
6 large egg yolks
6 tbsp (75 grams) sugar

Instructions:
1.In a bowl, whisk together the egg yolks and sugar until the mixture turns pale yellow.

2.Combine the milk, cream and vanilla in a saucepan over medium high heat, bringing the mixture to a boil. Take off the heat.

3.Pour about ½ cup of the hot liquid into the yolk mixture, whisking constantly to keep from making scrambled eggs. Pour the yolk mixture into the pan with the remaining cream mixture and put the heat back on medium. Stir constantly with a wooden spoon until the mixture thickens enough to lightly coat the back of a wooden spoon. DO NOT OVERCOOK.

4.Remove the mixture from the heat and strain it through a fine mesh sieve into a bowl. Cover and refrigerate until the mixture is thoroughly chilled, about 2 hours or overnight.

Pavolova Assembly:
Pipe or spoon the mousse onto the pavlovas and drizzle with the mascarpone cream over the top. Dust with confectioner’s sugar and fresh fruit if desired.


March 28, 2010

March Daring Bakers: Orange You Glad I Made This?

**My apologies for the day-late posting. It's Passover-prep craziness here in Brina's Kitchen!**

The 2010 March Daring Baker’s challenge was hosted by Jennifer of Chocolate Shavings. She chose Orange Tian as the challenge for this month, a dessert based on a recipe from Alain Ducasse’s Cooking School in Paris.


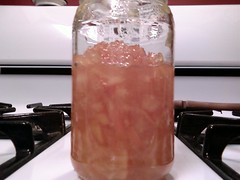
This is going to be a quickie post, since I have brisket on the stove and Passover rolls in the oven...but I'll tell you one thing. Homemade orange marmalade is AH.MAZ.ING. So so good. I ate it straight out of the jar.


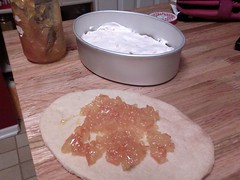
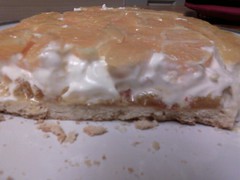
I made the Orange Tian (tee-ahn) earlier this month and was suprised to find that we actually liked it! I had been hesitant because I'm not usually a fan of oranges with whipped cream. It was relatively simple to make, just took a few steps over a few days. Over time, the pate sablee absorbed the marmalade, making it even more delicious.

Daring Bakers Orange Tian

Preparation time:
- Pate Sablee: 20 minutes to make, 30 minutes to rest, 15 minutes to roll out, 20 minutes to bake
- Marmalade: 20 minutes to make, 30 minutes to blanch
- Orange segments: 20 minutes, overnight to sit
- Caramel: 15 minutes, overnight to sit
- Whipped Cream: 15 minutes
- Assembling: 20 minutes
- Freezer to Set: 10 minutes

Equipment required:
• Cookie cutters . Ideally, you should have about 6 cookie cutters to build the desserts in and cut the circles of dough (see photo). The cookie cutters will be the size of your final dessert, so they should be the size of an individually-sized tart mold. If you don’t have round cookie cutters you could use an individually-sized cheesecake mold without its base.
• A food processor (although the dough could be made by hand too)
• A stand-up or hand mixer
• Parchment paper or a silicone sheet
• A baking sheet
• A rolling pin

For the Pate Sablee:

Ingredients U.S. Imperial Metric Instructions for Ingredients
2 medium-sized egg yolks at room temperature
granulated sugar 6 tablespoons + 1 teaspoon; 2.8 oz; 80 grams
vanilla extract ½ teaspoon
Unsalted butter ¼ cup + 3 tablespoons; 3.5 oz; 100 grams ice cold, cubed
Salt 1/3 teaspoon; 2 grams
All-purpose flour 1.5 cup + 2 tablespoons; 7 oz; 200 grams
baking powder 1 teaspoon ; 4 grams

Directions:
Put the flour, baking powder, ice cold cubed butter and salt in a food processor fitted with a steel blade.

In a separate bowl, add the eggs yolks, vanilla extract and sugar and beat with a whisk until the mixture is pale. Pour the egg mixture in the food processor.

Process until the dough just comes together. If you find that the dough is still a little too crumbly to come together, add a couple drops of water and process again to form a homogenous ball of dough. Form into a disc, cover with plastic wrap and leave to rest in the fridge for 30 minutes.
Preheat your oven to 350 degree Fahrenheit.

Roll out the dough onto a lightly floured surface until you obtain a ¼ inch thick circle.

Using your cookie cutter, cut out circles of dough and place on a parchment (or silicone) lined baking sheet. Bake for 20 minutes or until the circles of dough are just golden.

For the Marmalade:

Ingredients U.S. Imperial Metric Instructions for Ingredients
Freshly pressed orange juice ¼ cup + 3 tablespoons; 3.5 oz; 100 grams
1 large orange used to make orange slices
cold water to cook the orange slices
pectin 5 grams
granulated sugar: use the same weight as the weight of orange slices once they are cooked

Finely slice the orange. Place the orange slices in a medium-sized pot filled with cold water. Simmer for about 10 minutes, discard the water, re-fill with cold water and blanch the oranges for another 10 minutes.

Blanch the orange slices 3 times. This process removes the bitterness from the orange peel, so it is essential to use a new batch of cold water every time when you blanch the slices.

Once blanched 3 times, drain the slices and let them cool.

Once they are cool enough to handle, finely mince them (using a knife or a food processor).

Weigh the slices and use the same amount of granulated sugar . If you don’t have a scale, you can place the slices in a cup measurer and use the same amount of sugar.

In a pot over medium heat, add the minced orange slices, the sugar you just weighed, the orange juice and the pectin. Cook until the mixture reaches a jam consistency (10-15 minutes).

Transfer to a bowl, cover with plastic wrap and put in the fridge.

For the Orange Segments:

For this step you will need 8 oranges.

Cut the oranges into segments over a shallow bowl and make sure to keep the juice. Add the segments to the bowl with the juice.

[See YouTube video in the References section below for additional information on segmenting oranges.]

For the Caramel:

Ingredients U.S. Metric Imperial Instructions for Ingredients
granulated sugar 1 cup; 7 oz; 200 grams
orange juice 1.5 cups + 2 tablespoons; 14 oz; 400 grams

Place the sugar in a pan on medium heat and begin heating it.

Once the sugar starts to bubble and foam, slowly add the orange juice. As soon as the mixture starts boiling, remove from the heat and pour half of the mixture over the orange segments.

Reserve the other half of the caramel mixture in a small bowl — you will use this later to spoon over the finished dessert. When the dessert is assembled and setting in the freezer, heat the kept caramel sauce in a small saucepan over low heat until it thickens and just coats the back of a spoon (about 10 minutes). You can then spoon it over the orange tians.

[Tip: Be very careful when making the caramel — if you have never made caramel before, I would suggest making this step while you don’t have to worry about anything else. Bubbling sugar is extremely, extremely hot, so make sure you have a bowl of ice cold water in the kitchen in case anyone gets burnt!]

For the Whipped Cream:

Ingredients U.S. Metric Imperial Instructions for Ingredients
heavy whipping cream 1 cup; 7 oz; 200 grams
3 tablespoons of hot water
1 tsp Gelatine
1 tablespoon of confectioner's sugar
orange marmalade (see recipe above) 1 tablespoon

In a small bowl, add the gelatine and hot water, stirring well until the gelatine dissolves. Let the gelatine cool to room temperature while you make the whipped cream. Combine the cream in a chilled mixing bowl. Whip the cream using a hand mixer on low speed until the cream starts to thicken for about one minute. Add the confectioner sugar. Increase the speed to medium-high. Whip the cream until the beaters leave visible (but not lasting) trails in the cream, then add the cooled gelatine slowly while beating continuously. Continue whipping until the cream is light and fluffy and forms soft peaks. Transfer the whipped cream to a bowl and fold in the orange marmalade.
[Tip: Use an ice cold bowl to make the whipped cream in. You can do this by putting your mixing bowl, cream and beater in the fridge for 20 minutes prior to whipping the cream.]

Assembling the Dessert:


Make sure you have some room in your freezer. Ideally, you should be able to fit a small baking sheet or tray of desserts to set in the freezer.

Line a small tray or baking sheet with parchment paper or a silicone sheet. Lay out 6 cookie cutters onto the parchment paper/silicone.

Drain the orange segments on a kitchen towel.

Have the marmalade, whipped cream and baked circles of dough ready to use.

Arrange the orange segments at the bottom of each cookie cutter. Make sure the segments all touch either and that there are no gaps. Make sure they fit snuggly and look pretty as they will end up being the top of the dessert. Arrange them as you would sliced apples when making an apple tart.

Once you have neatly arranged one layer of orange segments at the bottom of each cookie cutter, add a couple spoonfuls of whipped cream and gently spread it so that it fills the cookie cutter in an even layer. Leave about 1/4 inch at the top so there is room for dough circle.

Using a butter knife or small spoon, spread a small even layer of orange marmalade on each circle of dough.

Carefully place a circle of dough over each ring (the side of dough covered in marmalade should be the side touching the whipping cream). Gently press on the circle of dough to make sure the dessert is compact.

Place the desserts to set in the freezer to set for 10 minutes.

Using a small knife, gently go around the edges of the cookie cutter to make sure the dessert will be easy to unmold. Gently place your serving plate on top of a dessert (on top of the circle of dough) and turn the plate over. Gently remove the cookie cutter, add a spoonful of caramel sauce and serve immediately.


mmmmm.....

January 27, 2010

Daring Bakers January Challenge: Oh, Canada...


The January 2010 Daring Bakers Challenge was hosted by Lauren of Celiac Teen. Lauren chose Gluten-Free Graham Wafers and Nanaimo Bars as the challenge for the month. The sources she based her recipe on are 101 Cookbooks and http://www.nanaimo.ca/.

This challenge introduced me to the Canadian sweet tooth! Nanaimo Bars are a dessert favorite in the Great White North, and all of the Canadian Daring Bakers went nuts. They were so excited. The rest of us scratched our heads and wondered how to pronounce them. Nannymo? Nahnee-i-mo? Nana-eemo? Turns out, it's Nah-nye-mo. I actually had to ask one of my Canadian students to explain it to me.

These uber-rich, super sweet and very very decadent bars are really easy to put together. The bottom layer is a mixture of crushed grahams, coconut, chocolate, almonds and butter. The middle layer is called a custard, but it's really just a layer of buttercream icing made with vanilla pudding mix, powdered sugar, and more butter. The final layer is a ganache, made with melted chocolate and oh yeah...more butter!

In order to make the recipe more challenging, we were asked to bake our own graham crackers. The original challenge called for gluten-free ingredients, but I wasn't really comfortable spending money to buy new flours (sweet rice, sorghum, tapioca starch) that I would never use again. Luckily, Lauren gave us the option of using AP Flour.

Did you know that homemade graham crackers smell AMAZING? And working with the dough will probably make you cry, it's so frustrating. But they are truly delicious. The final bars, though? Meh...not really my thing. I wasn't expecting the middle custard layer to be a true buttercream and it was just too rich for me. I would have enjoyed them more if I had spread on only a thin layer. Alex's coworkers; however, devoured them!

Recipe
Preparation time:
• Graham Wafers: 30 to 45 minutes total active prep, 2 ½ hours to overnight and 45 minutes inactive prep.
• Nanaimo Bars: 30 minutes.

Equipment required:
• Food Processor
• Bowls
• Parchment paper or silpats
• Cookie sheets
• Double boiler or pot and heatproof bowl
• 8 by 8 inch square pan
• Hand mixer or stand mixer (You may use a wooden spoon, but this makes it much easier!)
• Saucepan

For Gluten-Free Graham Wafers


Ingredients:
1 cup (138 g) (4.9 ounces) Sweet rice flour (also known as glutinous rice flour)
3/4 cup (100 g) (3.5 ounces) Tapioca Starch/Flour
1/2 cup (65 g) (2.3 ounces) Sorghum Flour
1 cup (200 g) (7.1 ounces) Dark Brown Sugar, Lightly packed
1 teaspoon (5 mL) Baking soda
3/4 teaspoon (4 mL ) Kosher Salt
7 tablespoons (100 g) (3 ½ ounces) Unsalted Butter (Cut into 1-inch cubes and frozen)
1/3 cup (80 mL) Honey, Mild-flavoured such as clover.
5 tablespoons (75 mL) Whole Milk
2 tablespoons (30 mL) Pure Vanilla Extract

If making the graham crackers with wheat, replace the gluten-free flours (tapioca starch, sweet rice flour, and sorghum flour) with 2 ½ cups plus 2 tbsp of all-purpose flour, or wheat pastry flour. Watch the wheat-based graham wafers very closely in the oven, as they bake faster than the gluten-free ones, sometimes only 12 minutes.

Directions:
1. In the bowl of a food processor fitted with a steel blade, combine the flours, brown sugar, baking soda, and salt. Pulse on low to incorporate. Add the butter and pulse on and off, until the mixture is the consistency of a coarse meal. If making by hand, combine aforementioned dry ingredients with a whisk, then cut in butter until you have a coarse meal. No chunks of butter should be visible.

2. In a small bowl or liquid measuring cup, whisk together the honey, milk and vanilla. Add to the flour mixture until the dough barely comes together. It will be very soft and sticky.
3. Turn the dough onto a surface well-floured with sweet rice flour and pat the dough into a rectangle about 1 inch thick. Wrap in plastic and chill until firm, about 2 hours, or overnight.

4. Divide the dough in half and return one half to the refrigerator. Sift an even layer of sweet rice flour onto the work surface and roll the dough into a long rectangle, about 1/8 inch thick. The dough will be quite sticky, so flour as necessary. Cut into 4 by 4 inch squares. Gather the scraps together and set aside. Place wafers on one or two parchment-lined baking sheets. Chill until firm, about 30 to 45 minutes. Repeat with the second batch of dough.

5. Adjust the rack to the upper and lower positions and preheat oven to 350 degrees Fahrenheit (180 degrees Celsius).

6. Gather the scraps together into a ball, chill until firm, and reroll. Dust the surface with more sweet rice flour and roll out the dough to get a couple more wafers.

7. Prick the wafers with toothpick or fork, not all the way through, in two or more rows.

8. Bake for 25 minutes, until browned and slightly firm to the touch, rotating sheets halfway through to ensure even baking. Might take less, and the starting location of each sheet may determine its required time. The ones that started on the bottom browned faster.

9. When cooled completely, place enough wafers in food processor to make 1 ¼ cups (300 mL) of crumbs. Another way to do this is to place in a large ziplock bag, force all air out and smash with a rolling pin until wafers are crumbs.


Nanaimo Bars

Ingredients:

Bottom Layer
1/2 cup (115 g) (4 ounces) Unsalted Butter
1/4 cup (50 g) (1.8 ounces) Granulated Sugar
5 tablespoons (75 mL) Unsweetened Cocoa
1 Large Egg, Beaten
1 1/4 cups (300 mL) (160 g) (5.6 ounces) Gluten Free Graham Wafer Crumbs (See previous recipe)
1/2 cup (55 g) (1.9 ounces) Almonds (Any type, Finely chopped)
1 cup (130 g) (4.5 ounces) Coconut (Shredded, sweetened or unsweetened)

Middle Layer
1/2 cup (115 g) (4 ounces) Unsalted Butter
2 tablespoons and 2 teaspoons (40 mL) Heavy Cream
2 tablespoons (30 mL) Vanilla Custard Powder (Such as Bird’s. Vanilla pudding mix may be substituted.)
2 cups (254 g) (8.9 ounces) Icing Sugar

Top Layer
4 ounces (115 g) Semi-sweet chocolate
2 tablespoons (28 g) (1 ounce) Unsalted Butter

Directions:
1. For bottom Layer: Melt unsalted butter, sugar and cocoa in top of a double boiler. Add egg and stir to cook and thicken. Remove from heat. Stir in crumbs, nuts and coconut. Press firmly into an ungreased 8 by 8 inch pan.

2. For Middle Layer: Cream butter, cream, custard powder, and icing sugar together well. Beat until light in colour. Spread over bottom layer.

3. For Top Layer: Melt chocolate and unsalted butter over low heat. Cool. Once cool, pour over middle layer and chill.

-------------------------------
Additional Information:

These bars freeze very well, so don’t be afraid to pop some into the freezer.

The graham wafers may be kept in an airtight container for up to 2 weeks. Mine lasted about that long.

For the Nanaimo Bars, if making with wheat, replace the gluten-free graham wafer crumbs with equal parts wheat graham wafer crumbs!

December 26, 2009

December Daring Bakers: Home for the Holidays!


The December 2009 Daring Bakers’ challenge was brought to you by Anna of Very Small Anna and Y of Lemonpi. They chose to challenge Daring Bakers’ everywhere to bake and assemble a gingerbread house from scratch. They chose recipes from Good Housekeeping and from The Great Scandinavian Baking Book as the challenge recipes.

I had originally planned to print out a gingerbread house template online, but Alex asked if he could design it by hand. Who am I to say no? My guy had a blast measuring and cutting all the pieces, for both the house and my extra gingerbread structure. He did a great job! I used the recipe that Y selected (see below) and transported the pieces to my in-laws so that my mother and sister-in-law could help me decorate.

We had a few gingerbread casualties on the drive over and I began to lose heart. However, my mother-in-law is an architect (and professor of architechture), and it turns out that one of her end-of-term projects was to have her students build gingerbread houses from scratch. Did I pick the right partner or what? She had all sorts of tricks and tips for emergency repairs and structural support.


Broken pieces salvaged with royal icing "glue" and a cookie "support beam"

In-process structure supported by cans of beans. With cookie support in the background.

The house, before the decorating team arrived


Decorators hard at work


Isn't it great?


Look at this detail! Ivy and french doors? I would love to live here...


It's a Jewish Gingerbread Hanukkah House! See the menorah in the window and the mezuzah on the door?


When the challenge was first announced, I knew that I wanted to try to make something different. I always associated gingerbread houses with Christmas, so there really wasn't any reason for me to make one, but I did, to honor the Daring Bakers rules. However, I decided to also make a gingerbread dreidel just because it would be awesome. And it totally is.


I had a little driedel
I made it out of gingerbread
And when it's dry and ready,
I'll post it on the interweb...

*****************************************************


Scandinavian Gingerbread (Pepparkakstuga)
from The Great Scandinavian Baking Book by Beatrice Ojakangas


Ingredients:
1 cup butter, room temperature [226g]
1 cup brown sugar, well packed [220g]
2 tablespoons cinnamon
4 teaspoons ground ginger
3 teaspoons ground cloves
2 teaspoons baking soda
½ cup boiling water
5 cups all-purpose flour [875g]


Instructions:
1. In a large bowl, cream the butter and sugar until blended. Add the cinnamon, ginger and cloves. Mix the baking soda with the boiling water and add to the dough along with the flour. Mix to make a stiff dough. If necessary add more water, a tablespoon at a time. Chill 2 hours or overnight.

2. Cut patterns for the house, making patterns for the roof, front walls, gabled walls, chimney and door out of cardboard.

3. Roll the dough out on a large, ungreased baking sheet and place the patterns on the dough. Cut out the pieces with a knife, but leave the pieces in place.


4. From Y's notes: [I rolled out the dough on a floured bench, roughly 1/8 inch thick (which allows for fact that the dough puffs a little when baked), cut required shapes and transferred these to the baking sheet. Any scraps I saved and rerolled at the end.]

5. Preheat the oven to 375'F (190'C). Bake for 12 to 15 minutes until the cookie dough feels firm. After baking, again place the pattern on top of the gingerbread and trim the shapes, cutting the edges with a straight-edged knife. Leave to cool on the baking sheet.


Royal Icing

Ingredients:
3 TBS Meringue powder
4 cups sifted powdered sugar
5-6 TBS warm water


Instructions:
Combine all ingredients and using either a stand or hand mixer, beat on high until stiff peaks form, about 6-8 minutes.

November 28, 2009

Leave the gun, take the cannoli...


Sorry it's a day late! Thanksgiving got the best of me and I lost track of time...

The November 2009 Daring Bakers Challenge was chosen and hosted by Lisa Michele of Parsley, Sage, Desserts and Line Drives. She chose the Italian Pastry, Cannolo (Cannoli is plural), using the cookbooks Lidia’s Italian-American Kitchen by Lidia Matticchio Bastianich and The Sopranos Family Cookbook by Allen Rucker; recipes by Michelle Scicolone, as ingredient/direction guides. She added her own modifications/changes, so the recipe is not 100% verbatim from either book.

Cannoli are known as Italian-American pastries, although the origin of cannoli dates back to Sicily, specifically Palermo, where it was prepared during Carnevale season, and according to lore, as a symbol of fertility. The cannoli is a fried, tube-shaped pastry shell (usually containing wine) filled with a creamy amalgamation of sweetened ricotta cheese, chocolate, candied fruit or zest, and sometimes nuts. Although not traditional, mascarpone cheese is also widely used, and in fact, makes for an even creamier filling when substituted for part of the ricotta, or by itself.

I made these delicious cannoli earlier this week, and filled them with a Thanksgiving-themed cran-orange ricotta. They were so good! The shells were perfectly crisp, with just the right hint of cinnamon, and the tart filling was a great compliment.
My original intention had been to bake the shells, but as you can see below, that didn't really work.


So, I gave into the Daring Bakers Peer Pressure and deep fried them.


This time, the shells came out perfectly crispy and blistery - just like they were supposed to! I went for simple, instead of fancy, and filled a few of them with cran-orange ricotta. And then indulged in a fresh home-made cannoli - Buon appetito!

Equipment:
Cannoli forms/tubes - optional, but recommended if making traditional shaped cannoli.
Dried cannelloni pasta tubes work just as well!
Deep, heavy saucepan, enough to hold at least 2-3-inches of oil or deep fryer
Deep fat frying thermometer. although the bread cube or bit of dough test will work fine.
Metal tongs
Brass or wire skimmer OR large slotted spoon
Pastry bag with large star or plain tip, but a snipped ziplock bag, butter knife or teaspoon will work fine.
Cooling rack
Paper bags or paper towels
Pastry Brush
Cheesecloth, Sieve or fine wire mesh strainer
Electric Mixer, stand or hand, optional, as mixing the filling with a spoon is fine.
Food Processor or Stand Mixer – also optional, since you can make the dough by hand, although it takes more time.
Rolling pin and/or Pasta roller/machine
Pastry or cutting board
Round cutters - The dough can also be cut into squares and rolled around the cannoli tube prior to frying. If making a stacked cannoli, any shaped cutter is fine, as well as a sharp knife.
Mixing bowl and wooden spoon if mixing filling by hand
Plastic Wrap/Clingfilm
Tea towels or just cloth towels

Bonus option: Make your own ricotta and/or mascarpone cheese! http://lisamichele.wordpress.com/2009/05/04/eating-my-curds-and-ditching-the-whey/http://www.bakingobsession.com/2009/05/02/homemade-mascarpone-cheese/

Technically, I know, this is not baking, and if you prefer to steer clear of the deep fry, you can bake the shell. You won’t get the snappy, blistery texture and appearance that make cannoli so special, but I’m sure it’ll taste good nonetheless. Here’s a link where the cook bakes some of his cannoli shells: http://www.ifood.tv/network/cannoli/recipes

Lidisano’s Cannoli
Makes 22-24 4-inch cannoli
Prep time:Dough – 2 hours and 10-20 minutes, including resting time, and depending on whether you do it by hand or machine.
Filling – 5-10 minutes plus chilling time (about 2 hours or more)
Frying – 1-2 minutes per cannoliAssemble – 20–30 minutes

RECIPE NOTE: THE EQUIVALENTS FROM THIS RECIPE WERE PREPARED USING THIS CONVERSION SITE: http://www.gourmetsleuth.com/index.asp.

CANNOLI SHELLS
2 cups (250 grams/8.82 ounces) all-purpose flour
2 tablespoons(28 grams/1 ounce) sugar
1 teaspoon (5 grams/0.06 ounces) unsweetened baking cocoa powder
1/2 teaspoon (1.15 grams/0.04 ounces) ground cinnamon
1/2 teaspoon (approx. 3 grams/0.11 ounces) salt
3 tablespoons (42 grams/1.5 ounces) vegetable or olive oil
1 teaspoon (5 grams/0.18 ounces) white wine vinegar
Approximately 1/2 cup (approx. 59 grams/approx. 4 fluid ounces/approx. 125 ml) sweet Marsala or any white or red wine you have on hand
1 large egg, separated (you will need the egg white but not the yolk)Vegetable or any neutral oil for frying – about 2 quarts (8 cups/approx. 2 litres)
1/2 cup (approx. 62 grams/2 ounces) toasted, chopped pistachio nuts, mini chocolate chips/grated chocolate and/or candied or plain zests, fruits etc.. for garnish
Confectioners' sugar
Note - If you want a chocolate cannoli dough, substitute a few tablespoons of the flour (about 25%) with a few tablespoons of dark, unsweetened cocoa powder (Dutch process) and a little more wine until you have a workable dough (Thanks to Audax).

CANNOLI FILLING
2 lbs (approx. 3.5 cups/approx. 1 kg/32 ounces) ricotta cheese, drained
1 2/3 cups cup (160 grams/6 ounces) confectioner’s sugar, (more or less, depending on how sweet you want it), sifted
1/2 teaspoon (1.15 grams/0.04 ounces) ground cinnamon
1 teaspoon (4 grams/0.15 ounces) pure vanilla extract or the beans from one vanilla bean
3 tablespoons (approx. 28 grams/approx. 1 ounce) finely chopped good quality chocolate of your choice
2 tablespoons (12 grams/0.42 ounces) of finely chopped, candied orange peel, or the grated zest of one small to medium orange
3 tablespoons (23 grams/0.81 ounce) toasted, finely chopped pistachios
Note - If you want chocolate ricotta filling, add a few tablespoons of dark, unsweetened cocoa powder to the above recipe, and thin it out with a few drops of warm water if too thick to pipe.

DIRECTIONS FOR SHELLS:

1. In the bowl of an electric stand mixer or food processor, combine the flour, sugar, cocoa, cinnamon, and salt. Stir in the oil, vinegar, and enough of the wine to make a soft dough. Turn the dough out onto a lightly floured surface and knead until smooth and well blended, about 2 minutes. Shape the dough into a ball. Cover with plastic wrap and let rest in the fridge from 2 hours to overnight.

2. Cut the dough into two pieces. Keep the remaining dough covered while you work. Lightly flour a large cutting or pastry board and roll the dough until super thin, about 1/16 to 1/8” thick (An area of about 13 inches by 18 inches should give you that). Cut out 3 to 5-inch circles (3-inch – small/medium; 4-inch – medium/large; 5-inch;- large. Your choice). Roll the cut out circle into an oval, rolling it larger and thinner if it’s shrunk a little.

3. Oil the outside of the cannoli tubes (You only have to do this once, as the oil from the deep fry will keep them well, uhh, oiled..lol). Roll a dough oval from the long side (If square, position like a diamond, and place tube/form on the corner closest to you, then roll) around each tube/form and dab a little egg white on the dough where the edges overlap. (Avoid getting egg white on the tube, or the pastry will stick to it.) Press well to seal. Set aside to let the egg white seal dry a little.


4. In a deep heavy saucepan, pour enough oil to reach a depth of 3 inches, or if using an electric deep-fryer, follow the manufacturer's directions. Heat the oil to 375°F (190 °C) on a deep fry thermometer, or until a small piece of the dough or bread cube placed in the oil sizzles and browns in 1 minute. Have ready a tray or sheet pan lined with paper towels or paper bags.

5. Carefully lower a few of the cannoli tubes into the hot oil. Do not crowd the pan. Fry the shells until golden, about 2 minutes, turning them so that they brown evenly.

6. Lift a cannoli tube with a wire skimmer or large slotted spoon, out of the oil. Using tongs, grasp the cannoli tube at one end. Very carefully remove the cannoli tube with the open sides straight up and down so that the oil flows back into the pan. Place the tube on paper towels or bags to drain. Repeat with the remaining tubes. While they are still hot, grasp the tubes with a potholder and pull the cannoli shells off the tubes with a pair of tongs, or with your hand protected by an oven mitt or towel. Let the shells cool completely on the paper towels. Place shells on cooling rack until ready to fill.

7. Repeat making and frying the shells with the remaining dough. If you are reusing the cannoli tubes, let them cool before wrapping them in the dough.


Pasta Machine method:
1. Divide the dough into 4 equal pieces. Starting at the middle setting, run one of the pieces of dough through the rollers of a pasta machine. Lightly dust the dough with flour as needed to keep it from sticking. Pass the dough through the machine repeatedly, until you reach the highest or second highest setting. The dough should be about 4 inches wide and thin enough to see your hand through

2. Continue rolling out the remaining dough. If you do not have enough cannoli tubes for all of the dough, lay the pieces of dough on sheets of plastic wrap and keep them covered until you are ready to use them.
3, Roll, cut out and fry the cannoli shells as according to the directions above.
For stacked cannoli:1. Heat 2-inches of oil in a saucepan or deep sauté pan, to 350-375°F (176 - 190 °C).

2. Cut out desired shapes with cutters or a sharp knife. Deep fry until golden brown and blistered on each side, about 1 – 2 minutes. Remove from oil with wire skimmer or large slotted spoon, then place on paper towels or bags until dry and grease free. If they balloon up in the hot oil, dock them lightly prior to frying. Place on cooling rack until ready to stack with filling.

DIRECTIONS FOR FILLING:
1. Line a strainer with cheesecloth. Place the ricotta in the strainer over a bowl, and cover with plastic wrap and a towel. Weight it down with a heavy can, and let the ricotta drain in the refrigerator for several hours to overnight.

2. In a bowl with electric mixer, beat ricotta until smooth and creamy. Beat in confectioner’s sugar, cinnamon, vanilla and blend until smooth. Transfer to another bowl and stir in chocolate, zest and nuts. Chill until firm.(The filling can be made up to 24 hours prior to filling the shells. Just cover and keep refrigerated).

ASSEMBLE THE CANNOLI:
1. When ready to serve..fill a pastry bag fitted with a 1/2-inch plain or star tip, or a ziplock bag, with the ricotta cream. If using a ziplock bag, cut about 1/2 inch off one corner. Insert the tip in the cannoli shell and squeeze gently until the shell is half filled. Turn the shell and fill the other side. You can also use a teaspoon to do this, although it’s messier and will take longer.

2. Press or dip cannoli in chopped pistachios, grated chocolate/mini chocolate chips, candied fruit or zest into the cream at each end. Dust with confectioner’s sugar and/or drizzles of melted chocolate if desired.

October 27, 2009

Birthday Macarons (Daring Bakers October Challenge)

I can run, but I can't hide. A wise friend told me that my 30's will be as great as my 20's, but with money. I like that!

In honor of my birthday, Daring Bakers made today the posting date for the October Challenge. Okay, not really, it is just a coincidence, but it's still pretty fun to post such a great recipe today!

The 2009 October Daring Bakers’ challenge was brought to us by Ami S. She chose macarons from Claudia Fleming’s The Last Course: The Desserts of Gramercy Tavern as the challenge recipe.


THE DARING COOKS OCTOBER 2009 CHALLENGE: MACAROONS

Introduction: Unless you’ve been frozen in permafrost for the past five years, you’ve likely noticed that cupcake bakeries have popped up all over like iced mushrooms. Knock one down, and three take its place. Much has been made about not only the cupcake’s popularity, but also its incipient demise as the sweet du jour. Since we seem to be a culture intent on the next sensation, pundits, food enthusiasts and bloggers have all wondered what this sensation might be. More than a few have suggested that French-style macaroons (called macarons in France) might supplant the cupcake. This may or may not come to pass, but the basic premise of the French macaroon is pretty damned tasty.

In the United States, the term “macaroon” generally refers to a cookie made primarily of coconut. But European macaroons are based on either ground almonds or almond paste, combined with sugar and egg whites. The texture can run from chewy, crunchy or a combination of the two. Frequently, two macaroons are sandwiched together with ganache, buttercream or jam, which can cause the cookies to become more chewy. The flavor possibilities and combinations are nigh endless, allowing infinitely customizable permutations.


I was excited for this challenge, but very intimidated. For such a simple recipe (egg whites, sugar, almond flour), it is extremely tempermental and will make you want to rip your hair out while you fling the fallen egg whites across the room, screaming "I HATE YOU STUPID MACARONS!"

That is, until you peak in the oven and discover that yours have grown "feet", the proper macaronage base, and then you're screaming "I MADE FEET! THEY HAVE FEET!"

see the little "feet" at the bottom?

All in all, I attempted 5 batches of French macarons. The only successful batch was the first one. The next 3 fell flat (like little pancakes) and the final one looked right, but the nut flour was rancid and they tasted terrible. I used walnuts that had been in the freezer for a while and they must have gone bad at some point. Ick.

Mariel and her roommate helped me bake and fill the successful batch with a simple chocolate ganache.


If I had more time and patience (and more egg whites), I might have tried a more complicated flavor of macaron with a different filling, like a buttercream. Some of the Daring Bakers got very creative with their flavors! They look fantastic.

I don't think I will ever make these again, as it's a little too ungapatch (Yiddish for fussy), even though the final product was delicious! Thanks for a really great baking challenge this month, DB! I can't wait to see what we're making for November.

Preparation time: Not taking into account the amount of time it takes for you to bring your egg whites to room temperature, the whole baking process, including making the batter, piping and baking will probably take you about an hour to an hour and a half. How long it takes to make your filling is dependent on what you choose to make.

Actual baking time: 12 minutes total, plus a few minutes to get your oven from 200°F to 375°F.

Equipment required:
• Electric mixer, preferably a stand mixer with a whisk attachment
• Rubber spatula
• Baking sheets
• Parchment paper or nonstick liners
• Pastry bag (can be disposable)
• Plain half-inch pastry bag tip
• Sifter or sieve
• If you don’t have a pastry bag and/or tips, you can use a Ziploc bag with the corner snipped off
• Oven
• Cooling rack
• Thin-bladed spatula for removing the macaroons from the baking sheets
• Food processor or nut grinder, if grinding your own nuts (ouch!)

Ingredients:
Confectioners’ (Icing) sugar: 2 ¼ cups (225 g, 8 oz.)
Almond flour: 2 cups (190 g, 6.7 oz.)
Granulated sugar: 2 tablespoons (25 g , .88 oz.)
Egg whites: 5 (Have at room temperature. Most bakers will agree that the egg whites should be aged for about 3-5 days, in fridge, covered with paper towel).

Directions:
1. Preheat the oven to 200°F (93°C). Combine the confectioners’ sugar and almond flour in a medium bowl. If grinding your own nuts, combine nuts and a cup of confectioners’ sugar in the bowl of a food processor and grind until nuts are very fine and powdery.

2. Beat the egg whites in the clean dry bowl of a stand mixer until they hold soft peaks. Slowly add the granulated sugar and beat until the mixture holds stiff peaks.

3. Sift a third of the almond flour mixture into the meringue and fold gently to combine. If you are planning on adding zest or other flavorings to the batter, now is the time. Sift in the remaining almond flour in two batches. Be gentle! Don’t overfold, but fully incorporate your ingredients.

4. Spoon the mixture into a pastry bag fitted with a plain half-inch tip (Ateco #806). You can also use a Ziploc bag with a corner cut off. It’s easiest to fill your bag if you stand it up in a tall glass and fold the top down before spooning in the batter.

5. Pipe one-inch-sized (2.5 cm) mounds of batter onto baking sheets lined with nonstick liners (or parchment paper).

6. Bake the macaroon for 5 minutes. Remove the pan from the oven and raise the temperature to 375°F (190°C). Once the oven is up to temperature, put the pans back in the oven and bake for an additional 7 to 8 minutes, or lightly colored.

7. Cool on a rack before filling.

Yield: 10 dozen. Ami's note: My yield was much smaller than this. I produced about two dozen filled macaroons.


Additional Information:
David Lebovitz breaks it down: http://www.davidlebovitz.com/archives/2008/09/making_french_macarons.htm...
More macaroon 411: http://www.seriouseats.com/2007/10/introduction-to-french-macarons.html
Get inspired by our own Tartlette!: http://www.mytartelette.com/search/label/macarons
Go behind the scenes of Paulette: http://www.youtube.com/watch?v=qXIvX0-CEu0

September 26, 2009

No Daring Bakers This Month

I apologize to my other Daring Bakers! The Jewish High Holidays got the best of me and my time, and I wasn't able to make this month's recipe. I'm posting on Saturday the 26th because tomorrow evening is Yom Kippur and I just won't have time to get to a computer.

Please check out the amazing talents of all the other Daring Bakers to see their delicious interpretations of this month's challenge.

Coming soon: homemade applesauce & chai apple cake

August 27, 2009

The Daring Bakers: Dobos Torta


The August 2009 Daring Bakers' challenge was hosted by Angela of A Spoonful of Sugar and Lorraine of Not Quite Nigella. They chose the spectacular Dobos Torte based on a recipe from Rick Rodgers' cookbook Kaffeehaus: Exquisite Desserts from the Classic Caffés of Vienna, Budapest, and Prague.

So, what is the Dobos Torta (or Torte)?

The Dobos Torta is a five-layer sponge cake, filled with a rich chocolate buttercream and topped with thin wedges of caramel. It was invented in 1885 by József C. Dobos, a Hungarian baker, and it rapidly became famous throughout Europe for both its extraordinary taste and its keeping properties. The recipe was a secret until Dobos retired in 1906 and gave the recipe to the Budapest Confectioners' and Gingerbread Makers' Chamber of Industry, providing that every member of the chamber can use it freely.

I made this cake last weekend, and it certainly was a challenge! I spent about 5 hours, start to finish, making sure that every component was right and I still ended up burning the caramel! Lesson learned: take it off the heat before it looks done! It will still come up to the perfect color on its own.
I halved the recipe and made 3 mini-Dobos. The sponge cake reminded me a little bit of Passover cake as it was slightly dry. I brushed one mini-Dobos with rum and another with espresso, which helped the cake moisture and added a great kick of flavor. The buttercream was really hard to work with in the August heat, although the flavor was nice and rich. Overall, the torta was delicious, but I don't think I'll make it again. It was a fun challenge and I only cursed a few times. Can't wait for next month's Daring Bakers challenge!


Ingredients:

Sponge cake layers
6 large eggs, separated, at room temperature
1 1/3 cups (162g) confectioner's (icing) sugar, divided
1 teaspoon (5ml) vanilla extract
1 cup plus 2 tablespoons (112g) sifted cake flour (SUBSTITUTE 95g plain flour + 17g cornflour (cornstarch) sifted together)
pinch of salt

Chocolate Buttercream
4 large eggs, at room temperature
1 cup (200g) caster sugar
4oz (110g) bakers chocolate or your favourite dark chocolate, finely chopped
2 sticks plus 2 tablespoons (250g) unsalted butter, at room temperature.

Caramel topping
1 cup (200g) caster sugar
12 tablespoons (180 ml) water
8 teaspoons (40 ml) lemon juice
1 tablespoon neutral oil (e.g. grapeseed, rice bran, sunflower)

Finishing touches
a 7” cardboard round
12 whole hazelnuts, peeled and toasted
½ cup (50g) peeled and finely chopped hazelnuts

Instructions:

Sponge Cake:
NB. The sponge layers can be prepared in advance and stored interleaved with parchment and well-wrapped in the fridge overnight.

1. Position the racks in the top and centre thirds of the oven and heat to 400F (200C).

2. Cut six pieces of parchment paper to fit the baking sheets. Using the bottom of a 9" (23cm) springform tin as a template and a dark pencil or a pen, trace a circle on each of the papers, and turn them over (the circle should be visible from the other side, so that the graphite or ink doesn't touch the cake batter.)

3. Beat the egg yolks, 2/3 cup (81g) of the confectioner's (icing) sugar, and the vanilla in a medium bowl with a mixer on high speed until the mixture is thick, pale yellow and forms a thick ribbon when the beaters are lifted a few inches above the batter, about 3 minutes. (You can do this step with a balloon whisk if you don't have a mixer.)

4. In another bowl, using clean beaters, beat the egg whites until soft peaks form. Gradually beat in the remaining 2/3 cup (81g) of confectioner's (icing)sugar until the whites form stiff, shiny peaks. Using a large rubber spatula, stir about 1/4 of the beaten whites into the egg yolk mixture, then fold in the remainder, leaving a few wisps of white visible. Combine the flour and salt. Sift half the flour over the eggs, and fold in; repeat with the remaining flour.

5. Line one of the baking sheets with a circle-marked paper. Using a small offset spatula, spread about 3/4cup of the batter in an even layer, filling in the traced circle on one baking sheet. Bake on the top rack for 5 minutes, until the cake springs back when pressed gently in the centre and the edges are lightly browned. While this cake bakes, repeat the process on the other baking sheet, placing it on the centre rack. When the first cake is done, move the second cake to the top rack. Invert the first cake onto a flat surface and carefully peel off the paper. Slide the cake layer back onto the paper and let stand until cool. Rinse the baking sheet under cold running water to cool, and dry it before lining with another parchment. Continue with the remaining papers and batter to make a total of six layers. Completely cool the layers. Using an 8" springform pan bottom or plate as a template, trim each cake layer into a neat round. (A small serrated knife is best for this task.)

Buttercream:
1. Prepare a double-boiler: quarter-fill a large saucepan with water and bring it to a boil.
Meanwhile, whisk the eggs with the sugar until pale and thickened, about five minutes. You can use a balloon whisk or electric hand mixer for this.

2. Fit bowl over the boiling water in the saucepan (water should not touch bowl) and lower the heat to a brisk simmer. Cook the egg mixture, whisking constantly, for 2-3 minutes until you see it starting to thicken a bit. Whisk in the finely chopped chocolate and cook, stirring, for a further 2-3 minutes.

3. Scrape the chocolate mixture into a medium bowl and leave to cool to room temperature. It should be quite thick and sticky in consistency.

4. When cool, beat in the soft butter, a small piece (about 2 tablespoons/30g) at a time. An electric hand mixer is great here, but it is possible to beat the butter in with a spatula if it is soft enough. You should end up with a thick, velvety chocolate buttercream. Chill while you make the caramel topping.

Caramel Topping:
1. Choose the best-looking cake layer for the caramel top. To make the caramel topping: Line a jellyroll pan with parchment paper and butter the paper. Place the reserved cake layer on the paper. Score the cake into 12 equal wedges. Lightly oil a thin, sharp knife and an offset metal spatula.

2. Stir the sugar, water and lemon juice in a small saucepan. Bring to a boil over a medium heat, stirring often to dissolve the sugar. Once dissolved into a smooth syrup, turn the heat up to high and boil without stirring, swirling the pan by the handle occasionally and washing down any sugar crystals on the sides of the pan with a wet brush until the syrup has turned into an amber-coloured caramel.

3.The top layer is perhaps the hardest part of the whole cake so make sure you have a oiled, hot offset spatula ready. I also find it helps if the cake layer hasn't just been taken out of the refrigerator. I made mine ahead of time and the cake layer was cold and the toffee set very, very quickly—too quickly for me to spread it. Immediately pour all of the hot caramel over the cake layer. You will have some leftover most probably but more is better than less and you can always make nice toffee pattern using the extra to decorate. Using the offset spatula, quickly spread the caramel evenly to the edge of the cake layer. Let cool until beginning to set, about 30 seconds. Using the tip of the hot oiled knife (keep re-oiling this with a pastry brush between cutting), cut through the scored marks to divide the caramel layer into 12 equal wedges. Cool another minute or so, then use the edge of the knife to completely cut and separate the wedges using one firm slice movement (rather than rocking back and forth which may produce toffee strands). Cool completely.

Assembling the Dobos
Divide the buttercream into six equal parts.

Place a dab of chocolate buttercream on the middle of a 7 1/2” cardboard round and top with one cake layer. Spread the layer with one part of the chocolate icing. Repeat with 4 more cake layers. Spread the remaining icing on the sides of the cake.

Optional: press the finely chopped hazelnuts onto the sides of the cake.

Propping a hazelnut under each wedge so that it sits at an angle, arrange the wedges on top of the cake in a spoke pattern. If you have any leftover buttercream, you can pipe rosettes under each hazelnut or a large rosette in the centre of the cake. Refrigerate the cake under a cake dome until the icing is set, about 2 hours. Let slices come to room temperature for the best possible flavor

July 8, 2009

I did WHAT?!?

Uh oh...what have I gotten myself into? I just signed up to join the Daring Bakers and I'm kinda scared. These bakers make things like homemade streudel, spinach lasagna noodles...and YULE LOGS! What would this nice Jewish girl do with a Yule Log? I don't know, but I think that's the point of this membership. To challenge myself as a beginning baker and learn new skills and techniques. I was intimidated when I started TWD and it's been a total blast. So, I'm jumping into the mixing bowl with both feet. Hopefully, I'll be accepted as a member and will start next month!

The Daring Kitchen posts every month, but the recipes are kept on double secret probation until everyone posts. So you won't get any sneak peeks from me! You will, I'm sure, hear ridiculous stories about me spilling things all over myself and crying over fallen cakes :-)

Kitchen messes galore...here I come!