Showing posts with label Weight Watchers. Show all posts

July 8, 2011

Carne Bistec

It's been a while, but I'm back to blogging! Just started a new job a few weeks ago, so things are settling into a new routine at home. I do try to cook new recipes for dinner, and I take pictures (bad ones), but it's the posting part that's gotten a little tied up. So, here are a few older ones to catch up to today!


This recipe comes from Skinny Taste, and I had bookmarked it a long time ago. The combination of flavors (cumin, onions, tomatoes) and the ease of the recipe (chop, saute, eat) seemed very intriguing. Overall, I'm glad I tried this, but I wasn't a huge fan of it. I love cumin in my food, but for some reason, I wasn't really into caramelized onions and cumin on my steak. I think I'm more of a red wine sauce kind of girl. However, it was a tasty meal and Alex really enjoyed it!

Ingredients:
1-1/2 lbs grass fed sirloin tip steak, sliced very thin
salt to taste
garlic powder to taste
cumin to taste
4 tsp olive oil
1 medium onion, sliced thin or chopped
1 very large tomato or 2 medium tomatoes, sliced thin or chopped

Instructions:
Season steak with salt (skip if using kosher meat) and garlic powder. Heat a large frying pan until VERY HOT. Add 2 tsp of oil then half of the steak and cook less than a minute on each side. Set steak aside, add another teaspoon of oil and cook remaining steak. Set aside.

Reduce heat to medium, add another teaspoon of oil and add the onions.

Cook a minutes, then add the tomatoes. Season with salt, pepper and cumin and reduce heat to medium-low.

Add about 1/4 cup of water and simmer a few minutes to create a sauce, add more water if needed and taste adjust seasoning as needed. Return the steak to the pan along with the drippings, combine well and remove from heat.

Serve over rice or for a low carb option with a sunny-side up egg on top.

May 3, 2011

Cheesy Zucchini Enchiladas


Sounds a little strange, but these are mouth-wateringly delicious. I snagged the recipe from Gina's Skinny Taste blog and was very excited to try it based on all the reviews and comments. I love the recipes in her blog!

She uses large La Tortilla Factory wraps, but I couldn't find them anywhere around me. I ended up using smaller regular tortillas from Whole Foods, which made 8 enchiladas instead of her original 4.

The filling is garlicky and creamy from the cheese, and the homemade enchilada sauce is smoky and spicy. We loved this recipe and I can't wait to make it again! Definite winner.

Ingredients:
Filling:
cooking spray
1 tsp olive oil
2 cloves garlic, crushed
2 medium scallions, chopped
1/4 cup cilantro, chopped
2 medium zucchinis, grated
kosher salt and fresh ground pepper
1 1/2 cups grated reduced fat mexican blend cheese
4 Large La Tortilla Factory Low Carb tortillas
chopped scallions (optional)
chopped cilantro (optional)

Enchilada sauce:
1 garlic cloves, minced
1 tbsp chipotle chilis in adobo sauce (optional for more heat)
1 cups tomato sauce
1/4 tsp chipotle chili powder (to taste)
1/4 tsp ground cumin
1/2 cup fat free vegetable broth
kosher salt and fresh pepper to taste

Instructions:
For the enchilada sauce: in a medium saucepan, spray oil and sauté garlic. Add chipotle chile, chili powder, cumin, broth, tomato sauce, salt and pepper. Bring to a boil. Reduce the heat to low and simmer for 5-10 minutes. Set aside until ready to use.

Spray a baking dish with nonstick spray. Preheat oven to 400 degrees.

a medium nonstick skillet, sauté garlic and scallions in olive oil over medium heat for about 3 minutes; add zucchini, salt and pepper to taste and cook about 4-5 minutes.

Remove from heat and add 1/2 cup cheese; mix well. Divide zucchini between in each tortilla, roll and place seam side down in baking dish. Top with enchilada sauce (you might not use all) and remaining cheese and bake until hot and the cheese is melted, about 20 minutes.

Serve with chopped cilantro, scallions, and reduced fat sour cream if you wish. Enjoy!!
This ends up being 7 pointsplus per serving.

March 5, 2011

Lemon Caper Chicken Thighs

So I've been a little preoccupied. Can you blame me? With these 12.5lbs of deliciousness hanging around, it's a little hard to get anything done! Eli is scrumptious and just the sweetest most mellow baby ever. Just like his daddy.


As it turns out, cooking and baking one-handed while bouncing around a baby and singing "Old MacDonald..." isn't as easy as you'd think! Most of the dinners I have thrown together over the past few weeks have either been an old favorite that I knew by heart, or a bunch of odds and ends. However, I did go back to Weight Watchers, so you'll see a lot more of their recipes on here.

This newest addition is chicken thighs sauteed in a lemon-caper sauce. Very easy, and very delicious! I had some boneless skinless thighs to use up, and this recipe popped out at me because we love capers in just about everything. The final sauce was nice and tart from the lemon, and each bite of caper gave off a really good salty contrast. I will definitely make this one again!

Lemon Caper Chicken Thighs
adapted from Weight Watchers

Ingredients:
1 spray(s) cooking spray
1/4 cup(s) all-purpose flour
1/4 tsp black pepper
1 1/4 pound(s) skinless chicken thigh(s), about 8 thighs (buy regular ones, take the skin off)
1 cup(s) canned chicken broth
2 Tbsp fresh lemon juice
1 1/2 Tbsp capers (I used at least 3TBS)

3 cup(s) uncooked string beans, steamed or roasted, as your side dish

Instructions:
Coat a 12-inch nonstick skillet with cooking spray; set over medium-high heat.

In a small bowl, combine flour with pepper; sprinkle over chicken. Brown chicken in a single layer in prepared skillet until golden on bottom, about 6 minutes; flip and brown on second side, about 4 minutes more. Remove chicken from skillet; set aside. (If necessary, brown chicken in two batches.)

Pour broth into skillet and scrape up any browned bits with a wooden spoon. Return chicken to skillet, cover and reduce heat to low; simmer until heated through, about 3 minutes. Stir in lemon juice and capers; heat for 30 seconds. Yields 2 chicken thighs, 3/4 cup string beans and about 1 1/2 tablespoons sauce per serving.

6 pointsplus per serving


October 11, 2010

Spicy Biscotti for a Spicy Gal


My friend Val is awesome. How awesome is she? Well...let me tell you...

1) We survived grad school together...in INDIANA. East coast Jewish ladies don't belong in Indiana. She would buy me vanilla lattes with her on-campus dining points and always made me smile. She was a year ahead of me and gave great "survive this program" advice

2) She introduced me to the amazing world of kick-ass college a capella

3) I loved visiting her apartment b/c it was always decorated in the most amazing way - colorful, Broadway inspired and oh-so-cheerful

4) She doesn't take it personally when I say "DUKE SUCKS!" b/c even though she works there, she knows I still love her

5) She designed this blog like a trillion months ago and let me pay her in cookies

So...I have finally gotten my pregnant butt in gear and baked her cookies. They will be shipped off to North Carolina, where she and her very bakingly-talented fiance Matt will enjoy them. Val and Matt try to eat healthy, so she requested some Weight Watcher friendly treats. No problem! I knew that the mini-chocolate chip cookies would be a winner, and I thought about making meringues. Turns out, though, that meringues are not a shipping friendly cookie. Those things will turn to sugary dust if you look at them wrong. Hearty biscotti it was, then!

This recipe came from a random internet search and I was a little skeptical of the spice amounts. I tweaked them based on my experiences and I'm very happy with the results (I ate the end pieces and saved them the rest!). I did make a few changes to the baking time, since I think it needed some help in that area. But overall, these spiced biscotti are delicious! They would be great with a cup of tea or coffee...or even dunked in a glass of milk.

Weight Watchers Spiced Biscotti (2 points each)
Ingredients:
1 cup granulated sugar
1 cup packed dark brown sugar
1/2 cup sliced almonds
1/3 cup vegetable oil
2 teaspoons ground cloves (changed to 1tsp ground cloves, 1/2 tsp cinnamon, pinch nutmeg)
2 large egg whites
1 large egg
2 1/2 cups all-purpose flour
2 teaspoons baking powder
Cooking spray (or silicone baking mats)

Instructions:
Heat oven to 375 degrees F.

Combine first 7 ingredients in a large bowl; beat at low speed of a mixer for 1 minute. Combine flour and baking powder in a small bowl; gradually add flour mixture to sugar mixture, beating until well-blended (dough will be soft).

Turn dough out onto a lightly floured surface; shape dough into 3 (6 x 4-inch) rectangles. Place rectangles on a baking sheet covered with cooking spray; flatten to 3/4 inch thickness. Bake at 375 degrees F for 25 minutes. Remove rectangles from baking sheet; cool 10 minutes on a wire rack.
*note - mine were still raw in the middle after 25 minutes, perhaps b/c I made them thicker than 3/4 inch. If you make them larger, increase baking time to about 30-35 minutes*

Cut each rectangle diagonally into (3/4 inch) slices. If they are still raw in the center, reduce oven heat to 250, line them back up on the baking sheet and bake for another 10 minutes at the low heat.

March 12, 2010

Spinach Lasagna Rolls


These mini-lasagnas are delicious and fun to make. I get a lot of great recipes from Gina's Weight Watcher Recipe Blog and finally decided to try something here. I threw extra seasoning into the filling, but other than that, just made it as written. These were enjoyed along with a lovely episode of It's Always Sunny in Philadelphia. Good times, folks. Good times.

Ingredients:
9 lasagna noodles, cooked
10 oz frozen chopped spinach, thawed and completely drained
15 oz fat free ricotta cheese
1/2 cup grated Parmesan cheese
1 egg
salt and fresh pepper
32 oz tomato sauce
9 tbsp (about 3 oz) part skim mozzarella cheese, shredded
Optional: oregano, basil, other Italian seasoning

Instructions:
Preheat oven to 350°. Combine spinach, ricotta, Parmesan, egg, salt, pepper and other seasoning in a medium bowl. Ladle about 1 cup sauce on the bottom of a 9 x 12 baking dish.

Place a piece of wax paper on the counter and lay out lasagna noodles. Make sure noodles are dry. Take 1/4 cup of ricotta mixture and spread evenly over noodle. Roll carefully and place seam side down onto the baking dish. Repeat with remaining noodles.

Ladle sauce over the noodles in the baking dish and top each one with 1 tbsp mozzarella cheese. Put foil over baking dish and bake for 40 minutes, or until cheese melts. Makes 9 rolls.

To serve, ladle a little sauce on the plate and top with lasagna roll.
(as written, 4 points per roll)

September 16, 2009

Hungry Girl? Yes I am!

I signed up for the Hungry Girl emails because I love her recipe swaps and product recommendations. Some of the recipes aren't my style (too much artificial sweetener), but others, like this one, are a winner. As soon as I saw the email, I started craving this sandwich. And it was gooooood.

I made a few changes to the recipe, mostly because I was too lazy to print it out, but also because I didn't really want to use mayo.

"Ring My Bella Mushroom Sandwich" adapted from Hungrygirl.com

Ingredients:
1 large portabella mushroom, stem removed
1 tsp. olive oil
1/8 tsp. salt, or more to taste
2 dashes ground thyme, or more to taste
1 tbsp. fat-free mayonnaise (I omitted)
Dash cayenne pepper, or more to taste (I omitted)
1 stick light string cheese (I used a slice of FF swiss for me, and regular munster for Alex)
1 Arnold Select/Oroweat Sandwich Thins roll (LOVE these!)
1 tsp. light whipped butter or light buttery spread
2 dashes garlic powder
1 thick slice red onion, all rings intact
1 large slice tomato
1/2 cup shredded lettuce

Instructions:
Coat both sides of the mushroom with oil and sprinkle with salt and thyme. Gently rub the seasonings into the mushroom and set aside.

Season mayo to taste with cayenne pepper. Mix well and set aside. Pull string cheese into pieces and set aside as well.

Split apart your roll and spread the inside with butter. Sprinkle with garlic powder.

Bring a large skillet or a grill pan sprayed with nonstick spray to medium-high heat. Place roll halves in the pan with the buttered sides down. Once warm and toasty, remove and plate with the buttered sides up.

Place mushroom in the skillet/pan, rounded side up, along with the onion, side by side. Cook on one side for about 7 minutes and then flip. Allow the mushroom to get soft and start to release some juices. Flip it back, rounded side up, and top with the cheese, until it starts to melt.

Place mushroom on the bottom half of the roll. Top with onion, tomato, and lettuce. Spread the buttered side of the roll's top half with mayo, and finish off your sandwich with it.

(this is about 5 points as written)

August 14, 2009

Chickity China, The Chinese Chicken

You have a drumstick and your brain starts tickin'

Yes, I know all the lyrics to One Week by Barenaked Ladies. I memorized them when the Stunt CD came out and I was thrilled to have my ice cream flavor of choice validated by my favorite band - after all, if the totally awesome men of BNL thought vanilla is the finest of the flavors, then all was right in my teenaged world. But I digress...

This post is about Chinese Chicken. After I made the TWD Brownie Buttons with orange zest, I had a sad little naked orange looking at me. I couldn't bear to put it back in the bowl because I knew it would just get hard after a few days. So, I decided to make Orange Chicken. But, not the regular full-fat-fried-MSG-loaded-with-goopy-electric-sauce version. I went with a lighter healthier WW version.


It was good, but not outstanding. I was hoping for a sharper orange flavor, but I think I was limited because most of my zest was already in the brownies. I'll try this recipe again, but with a full orange's worth. Overall, it's a good one to try if you want Chinese food flavor without the heavy MSG'ed feeling.

Name this picture...

Ingredients:
2 tsp dark sesame oil
2 tsp orange zest, strips
1lb uncooked boneless, skinless chicken breast, four 4-oz pieces
1/8 tsp table salt, or to taste
1/8 tsp black pepper, or to taste
15 oz Sunfresh Mandarin Oranges In Light Syrup, or similar item
1/2 cup reduced-sodium chicken broth (I used vegetable)
1 TBS low-sodium soy sauce
1 TBS orange zest, finely grated, or to taste
2 tsp cornstarch

Instructions:
Heat the oil in a large nonstick skillet over medium-low heat. Add orange zest strips and cook, stirring, until fragrant and slightly cooked, about 1 to 2 minutes.

Meanwhile, season both sides of the chicken with salt and pepper. When the zest is finished, increase heat to medium-high; add the chicken to the skillet and cook until golden, flipping once, about 2 minutes per side.

Drain the oranges and reserve 1/4 cup of liquid. Add the oranges with reserved liquid to skillet and simmer for 2 minutes.

Whisk together broth, soy sauce, finely grated zest and cornstarch in a small bowl; add mixture to pan and simmer until sauce thickens and chicken is cooked through, about 3 minutes more.

Yields 1 piece of chicken and about 1/4 cup of sauce per serving. (5 points)

July 9, 2009

Breakfast. It's what's for dinner


Is there really anything better than breakfast for dinner? Alex and I make eggs all the time, but last night I was in the mood for something a little more fun. I found a new food blog and have been perusing all the yummy looking recipes. As soon as I saw the whole wheat pancakes, I knew I had to try them. I haven't had pancakes in soooooo long. My favorites are the IHOP Harvest Grain and Nut pancakes, but I also love the Pumpkin ones from Original House of Pancakes. Mmmmm....pancakes....

This original recipe makes 8 pancakes, normal sized (not ginormous IHOP size) and I didn't think that would be enough for us. How did I know this? Well, my bottomless pit highest freaking metabolism ever husband absolutely lives for IHOP All You Can Eat Pancake night. Seriously. His record is 10 pancakes, and remember, these are HUGE. Back in my eat-whatever-I-wanted days, I could get through 2...maybe 2 1/2 if I was really hungry. He and his friends plan a get together for this all you can eat extravaganza and shovel in as many pancakes as inhumanely possible. He's so proud of his 10. This is how I knew I should double the recipe.

And okay, so my pancakes aren't as pretty as the ones on Gina's blog post, but they were delicious! I threw in some blueberries, which made them even better, and tried to do raspberries. I have since learned that raspberries in pancakes is a bad bad idea. They burn and stick to the pan, spilling juice everwhere.

When you make these, please remember that your batter is supposed to be lumpy. Trust me, that's just how pancake batter works. Alton Brown says so. The lumps will cook out, and if you overmix your batter, trying to get rid of the lumps, you'll get tough pancakes and then nobody will want to eat them. The whole wheat flour makes them hearty and filling, but they aren't heavy. We topped ours with FF Cool Whip and sugar-free syrup, but you could also top them with jam or butter.

Ingredients:
1 cup whole wheat flour
2 tsp baking powder
1/4 tsp salt
1 cup 1% milk
3 large egg whites
2 tsp oil
1 TBS sugar or honey
1/4 tsp cinnamon
1 tsp vanilla
butter flavor cooking spray (I just used regular)

Instructions:
Mix all the dry ingredients in a bowl. Add the wet ingredients to the mixing bowl and mix well with a spoon until there are no more dry spots. Don't over-mix! It will be lumpy and THAT'S OKAY!

Heat a large skillet on medium heat. Spray oil to lightly coat and pour 1/4 cup of pancake batter. When the pancake starts to bubble, you may add your fruit if you wish. When the bubbles settle and the edges begin to set, flip the pancakes. Once they are golden brown, remove and keep warm in the oven (on low). Repeat with the remainder of the batter.

Top with fruit, preserves, honey, or your favorite sugar-free syrup. (extra points)
Makes 8 pancakes

3.5 points per 2 pancake serving

July 8, 2009

Lemon Chicken with Broccoli


Keeping kosher means that our grocery budget is a little higher than the average DINK couple (dual income no kids) because kosher meat tends to be really expensive. So when I found chicken cutlets on sale for $3.99 lb at the butcher, I stuffed our freezer full of them. Normally, boneless and skinless chicken breasts range from $5-$8 lb, depending on where you shop, so $3.99 is an absolute steal. In fact, I wish I had bought more!

I found this recipe hidden away in my Favorites file on my WW account, and I had forgotten I saved it months ago. It was pretty quick to throw together, although I had to add some cornstarch at the end in order to get the sauce to thicken. I just don't think the flour was enough on its own. The lemon flavor should be pretty pronounced, which I like, but silly me forgot to buy a lemon. I was convinced I had one leftover from my Perfect Party Cake, but someone must have used it during the party. Instead of lemon zest, I had to use my lemon extract because the juice itself wasn't strong enough. The extract gave it a good lemon taste, but not as fresh as zest. Next time!
Ingredients:
2 TBS all-purpose flour
1/2 tsp table salt, divided
1/4 tsp black pepper, freshly ground
12 oz uncooked boneless, skinless chicken breast, thinly sliced
2 tsp olive oil
1 1/2 cups fat-free, reduced-sodium chicken broth, divided (I used veggie broth)
2 tsp minced garlic
2 1/2 cups broccoli, small florets
2 tsp lemon zest, or more to taste
2 TBS parsley, fresh, chopped
1 TBS fresh lemon juice

Instructions:
On a plate, combine 1 1/2 tablespoons of flour, 1/4 teaspoon of salt and pepper; add chicken and turn to coat.

Heat oil in a large nonstick skillet over medium-high heat. Add chicken and cook, turning as needed, until lightly browned and cooked through, about 5 minutes; remove to a plate.
Put 1 cup of broth and garlic in same skillet; bring to a boil over high heat, scrapping up browned bits from bottom of pan with a wooden spoon. Add broccoli; cover and cook 1 minute.

In a small cup, stir together remaining 1/2 cup of broth, 1/2 tablespoon of flour and 1/4 teaspoon of salt; add to skillet and bring to a simmer over low heat. Cover and cook until broccoli is crisp-tender and sauce is slightly thickened, about 1 1/2 minutes. Stir in chicken and lemon zest; heat through.

Remove skillet from heat and stir in parsley and lemon juice; toss to coat. Yields about 1 cup per serving (3 points).

June 25, 2009

Man Food: Meatloaf and Mashed 'Taters


Alex lives for meatloaf. You just say the word and he gets this faraway look in his eyes, like he's remembering his last great meatloaf meal. And then he starts waxing poetic about leftover meatloaf sandwiches...and well, it's just all downhill from there.

I took pity on my guy, since he's been putting up with a TON of low-cal, low-fat, Weight Watcher calorie conscious meals for the past few months, and made him a big ol' meatloaf. I loaded it up with chipotle peppers and jalapenos and served next to homemade mashed potatoes. And then I made him watch So You Think You Can Dance.

Ingredients:
1 spray cooking spray
1 1/2 pounds uncooked lean ground beef
1 cup rolled oats
1 medium onion, finely chopped
1/2 tsp garlic powder
4 oz canned green chili peppers, mild, diced
1 large egg (and as I'm typing this, I realize that I forgot the egg. It tasted fine, but fell apart a little)
1 tbsp chili powder
2 tsp ground cumin
8 oz canned tomato sauce, divided
Optional: 1-2 chipotle pepper in adobo sauce, seeds removed.

Instructions:
Preheat oven to 375°F. Coat a loaf pan with cooking spray.
Combine all ingredients, except half of the tomato sauce, in a large mixing bowl; set remaining tomato sauce aside. Spoon the meatloaf mixture into prepared pan and smooth the top.
Bake for 60 minutes; spoon remaining sauce over meatloaf and cook 5 minutes more.
Slice into eight pieces. Yields 1 piece per serving.

Oh, and did I mention that this is WW? Only 4 pts per slice :)

June 24, 2009

Turkish Vegetable Stew with Israeli Cous-Cous

sorry it's so dark! bad kitchen lighting at 8pm.

I'm so money sometimes, I don't even know it. I was fretful that we didn't have anything planned for dinner because I had forgotten to defrost the meat, but then I saw the eggplant in the fridge and remembered I had one more recipe stashed away for a meatless night. Yay!

I'm not quite sure what is Turkish about this vegetable stew, but it is mighty tasty. It took about 30 minutes from start to finish, so it's an easy throw-together for a hurried night. Our HD box came in yesterday and after dragging Alex away from it to get to the gym, it was all I could do to get him to stop playing with the channels and help chop vegetables. I must admit, though, watching the movie Speed Racer in HD is certainly an experience!

This recipe is light but filling, especially with the cous-cous. Israeli cous-cous is larger than normal, almost pea-sized. I was apprehensive about some of the herbs (dill and cumin? together?) but went along with it anyways. It makes plenty, enough for us to each have two servings and then take some for our lunches today. I imagine it will be even better after sitting for a night and marinating!

Ingredients:
1 cup uncooked couscous, Israeli or toasted variety
1 TBS olive oil, divided
1 medium raw eggplant, cut into 1-inch chunks
2 medium zucchini, cut in half lengthwise and then sliced into 1/2-inch-thick pieces
1 medium yellow pepper, cut in 1-inch chunks
15 oz canned garbanzo beans, drained and rinsed
14 1/2 oz canned tomatoes, diced, with roasted garlic
1/2 cup water
1 tsp ground cumin
1/2 tsp table salt
1/2 tsp black pepper
1/2 cup scallions, sliced
1/3 cup dill, fresh, chopped (I used a few tsp of dried)
1/2 cup crumbled fat-free feta cheese (or goat cheese)

Instructions:
Make cous-cous according to package instructions. When it's finished, stir in 1 tsp of the oil.
Meanwhile, heat remaining 2 teaspoons of oil in a large nonstick skillet over medium-high heat. Add the eggplant; cook, stirring often, until lightly browned, about 3 minutes. Add the zucchini and yellow pepper; cook, stirring often, until vegetables are crisp-tender, about 5 minutes.
Stir in garbanzo beans, tomatoes, water, cumin, salt and pepper. Bring to a boil; reduce heat to low and simmer until vegetables are tender, about 5-8 minutes. Remove from heat and stir in scallions and dill.
To serve, spoon a scant 3/4 cup of couscous onto each of 4 serving plates or bowls and top each with 1 1/2 cups of stew. Sprinkle each with 2 tablespoons of cheese and serve. (leave off the cheese if you want to keep it parve).

June 23, 2009

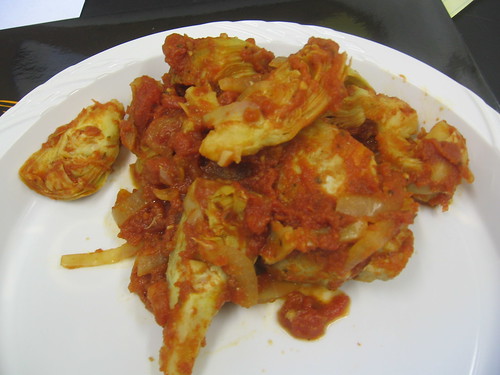
Chicken with Stewed Tomatoes and Artichokes


I'm back in the game, baby! Well, rather, my weekly meal planning is back on track. It makes my life so much easier. I just take some time on Sunday to pick out the weeks meals and then do my grocery shopping according to the recipes. This way, there is none of the "Ugh, it's 6PM. What the *&%^ are we making for dinner?" Although as I type this, I realize that I forgot to defrost the ground beef for tonights meatloaf, so this will be a pantry-raid night. Epic Fail.

Last night was a new recipe. I hit my kitchen groove and made my chicken dish, Crash Hot Potatoes, and another Lemon Rosemary French Yogurt Cake. I love that cake. It's so freakin' easy and delicious. Anyways, I digress...this post is about the chicken! This recipe (a WW one) is a good one. I made a few tweaks, but nothing major. Next time I do this, I won't cook the chicken for the full 25 minutes, because it was a tad dry, but overall I loved the flavor. I'm a big fan of artichoke hearts, so I added in a good amount. My changes are in italics.

Ingredients:
1 pound uncooked boneless, skinless chicken breast, four 4-oz pieces, cut in half
1 medium onion, sliced
3 cups canned crushed tomatoes, with Italian herbs
28 oz canned artichoke hearts, without oil, drained and quartered
2 medium garlic cloves, minced
2 tsp lemon zest
1 tbsp parsley, chopped (I didn't have)

Instructions:
Heat a large, nonstick skillet coated with cooking spray over high heat. Brown chicken; remove and set aside.
Over medium heat, cook the onion until it's lightly browned. Add in the garlic and lemon zest, cook until fragrant. Return chicken to skillet and stir in tomatoes and artichokes. Cover partially and simmer for 20 minutes.
Stir together garlic, zest and parsley for topping. Sprinkle each piece of chicken with some garlic topping and serve. (I didn't do this because I didn't want the raw garlic on the chicken. I liked the way the lemon flavored all the sauce in the pan.)
Next time, I would do the parsley on top for a little color. I forgot to take a picture last night, so you get a picture of my lunch leftovers. Yum-o!

June 19, 2009

DP Dough Wanna-be


Ahhh, DP Dough calzones. How I miss thee. I have so many fond college memories of hanging out in the sorority house, eating DP Dough while watching yet another episode of Sex and the City or Queer as Folk. Ahhhh, my 20-year-old metabolism. How I miss thee even more.

I posted the other day about falling into a cooking rut, so I was determined (read: fixated) on making at least one new recipe this week. I tweaked a WW pizza recipe to become a calzone and it satisfied my craving without carb overload. I hadn't started off with the idea of making it a calzone, but I didn't have enough filling to spread out over the whole length of pizza dough. Being the kitchen goddess/genius that I am, I simply folded the dough over and pretended that I had planned to make calzones all along. Ta dah! I'm cool like that.

Alex and I ate our dinner while spending time with the new addition to our family - the Samsung flat-screen TV. He's wanted one for so long and finally broke down and bought it. Hey, Sears was having a great sale - and he got 10% off. That's my boy! This 46-inch beast is gigantic. I honestly don't even know what to do with it, except stare in fascination. I can't wait to watch Iron Chef Japan in High Def. That's going to be a total trip.

Back to the calzone! This was pretty easy to make, except for the whole putting-the-leaves-in-the-blender part. They were supposed to form a paste, but instead, they got stuck way in the bottom, underneath the chopping blades and were a total pain to get out. Next time, I'll use our hand-held blender instead. Alex loved this, although I suspect that I could have served him cat food and he would have been just fine, eating it in front of his new love...Samsung.

Ingredients:
10 oz pizza dough, uncooked, about 12 inches. (I used the Pillsbury Thin Crust rollout dough)
cornmeal
1 cup arugula leaves
1 cup fresh basil
2 oz goat cheese
2 TBS parmesan cheese
1 tsp olive oil
Salt & pepper to taste

Instructions:
Preheat the oven to 400 (or whatever the dough instructions say).
Sprinkle cornmeal onto your baking sheet or pizza stone and spread out the dough. Combine arugula, basil, parmesean, oil and salt/pepper into the blender and pulse until it forms a paste. Spread it onto the dough (half of the dough to make a calzone, all of the dough for regular pizza) and dot with goat cheese. If you're making a 'zone, fold over the dough and crimp the edges closed. Bake 9-13 minutes, until the dough is golden brown and crispy, and cheese has melted.

April 27, 2009

Spicy Eggplant Pasta


Summer came early to Baltimore this weekend and it was in the high 80's for two straight days. I love the nice weather, but direct sunlight and I don't get along. I'm as pale as pale can be and I burn at even the mention of sun. In addition to that, one of my medications clearly states on the bottle "Avoid exposure to direct or artificial sunlight..." so, my pale pasty self stayed inside as much as possible (or at least in a lot of shade). Don't worry, I made good use of my Arbonne self-tanner so I don't scare little children when I put on shorts.


I spent my Saturday painting the powder room and singing really off-key versions of Lady Antebellum and Sugarland. I had stripped off the wallpaper a few weeks ago and finally got my butt in gear to prime and paint it. We chose a really nice bright blue, but I think it might be too bright. I went for the Satin finish and it's well...pretty shiny. I think I need to stare at it some more and get used to it. I'll post pics soon.

Then, after working for about 6 hours straight, I thought it would be a brilliant idea to cook dinner. Did I mention it was nearly 90 degrees? And I had been trapped in a tiny bathroom with paint fumes all day? So then I decided to heat up the small kitchen to a scorching 400 degrees. By the time dinner was done, I was a nice lobster-esque shade of red and totally exhausted. My sister-in-law asked if I had been laying outside and gotten some sun. Nope, nothing nearly as fun as that.

But, this dinner was totally worth it! The eggplant sauce is really spicy and hearty and the feta cheese is a cool compliment. I don't normally go for feta, but it makes this dish. The original recipe on WW tells you to grill the veggies, but I just roast them in the oven for about 10-15 minutes. I also recommend cutting them into bite-sized pieces before roasting so that they roast faster and you don't scorch your fingers trying to cut them when they come out of the oven. I changed that part of the instructions. Serve with some crunchy bread and sangria, like we did, and you've got yourselves a great dinner. No painting necessary.

Ingredients:
1 small eggplant, diced
1 red pepper, diced
2 tomatoes, chopped
1 spray cooking spray
3/4 tsp salt, divided
1 medium garlic clove, diced
1/4 tsp red pepper flakes
1/8 tsp black pepper (I use about 1/4 instead for more spice)
2 TBS fresh basil, minced
2 TBS fresh chives, minced (I didn't have this)
1/2 cup fat-free broth (chicken or veggie)
8 oz whole wheat angel hair pasta, cooked and drained
4 oz crumbled feta cheese


Instructions:
Place eggplant and pepper pieces in a grill basket (or place vegetables on a sheet of heavy duty aluminum foil with holes poked in it to allow smoke through). Off heat, coat vegetables with cooking spray; season with 1/2 teaspoon of salt. Place on grill and cook until lightly browned and tender, about 2 to 3 minutes per side. Remove from heat and cool to room temperature, and set aside.

OR

You can roast the vegetables if you prefer. Preheat oven to 425ºF. Coat a baking sheet with cooking spray. Place vegetables on prepared baking sheet and coat with cooking spray; season with 1/2 teaspoon of salt. Toss to coat. Roast, until lightly browned, about 20 minutes. Remove from oven and cool to room temperature.

Coat a large nonstick skillet with cooking spray; heat over low-medium heat. Add garlic and cook, stirring, for 1 minute. Add tomatoes and cook until slightly pulpy, about 1 minute more. Stir in vegetables, remaining 1/4 teaspoon of salt, red pepper flakes, black pepper, basil, chives and broth; increase heat to medium-high. Cook until broth is slightly reduced and mixture has a sauce consistency, about 2 to 3 minutes. Add pasta and toss to coat. Stir in cheese just before serving. Yields about 1 1/2 cups per serving. 4 points per serving.

March 12, 2009

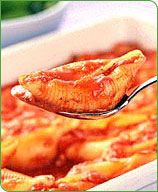
"Shell" I continue?

picture from weightwatchers.com because their shells are much prettier than mine

I know I said I didn't think these were a blog-worthy recipe, but Alex really likes them. And since I'm a blog-slacker (TWD, I'm sorry!!), I'm going to share them with you. They are a tasty meal, filling and low-calorie, and pretty easy to put together.

We're in the process of trying to eat up all our non-Kosher for Passover foods, so it was great to use up most of my leftover pasta shells. I'll blog more about Passover and Kosher for Passover (k4p) foods in a little bit. Right now, the idea of cleaning out the whole kitchen makes me want to curl up in a little ball and cry.

Where was I?...Oh right, Stuffed Shells!

Ingredients:
1 cup part-skim ricotta cheese
1 cup fat-free cottage cheese
1 tsp table salt
1 tsp garlic powder, or to taste
1 TBS dried oregano
1/4 tsp black pepper
3 cups canned tomato sauce
1 pound cooked pasta, jumbo shells, approximately 24 shells

Optional: I add in defrosted and drained chopped spinach to bulk up the filling and add some greens! It's a good addition - try it! I also mix in a little reduced fat mozzarella cheese to up the gooeyness factor.


Instructions:
Preheat oven to 375°F.

Fill a pot with water and cook the shells according to directions. I put more than 24 shells in because some will split while cooling and it's hard to fill the broken ones! While they are cooking, mix together cheeses, salt, garlic powder, oregano and pepper in a medium bowl. Mix in spinach if you're using it.

Spread a few spoonfuls of tomato sauce on bottom of a 9- x 13-inch baking dish and move it around so the bottom is covered.

When cooked shells are cool enough to handle, fill each shell with cheese mixture and place in the baking dish. When all the shells are in the dish, spoon the remaining tomato sauce over shells. You can sprinkle on some mozzarella here if you wish, but be sure to count the points for anything you add! Cover the pan with foil and bake for 20-30 minutes, until the sauce is bubbling.

Yields about 4 shells per serving = 4 points (without mozzarella added in)

February 23, 2009

Lemon-Lime Cookie Crisps


When I went through my baking frenzy this past Friday night, I knew I had to make something WW-friendly that I could snack on and not feel badly about. I'm not sure how much it helped, since I still nibbled on some pieces of the Caramel Crunch Bars (recipe to come tomorrow!), but these were a tasty surprise that I'll definitely make again!

The only thing I would change is to spread the batter out even more thinly on the baking sheet so that the cookies stay translucent. I was a little too conservative and they weren't really 3 inches across, like the directions state. When they were too thick, they just stayed chewy and sticky. They tasted really good, but the texture wasn't the best. The instructions told me to separate the batter and make 1/2 lemon and 1/2 lime, but I wanted the two flavors together, which ended up being delicious. Next time, I might even try orange zest for a true citrus extravaganza!

Ingredients:
3 1/3 TBS unsalted butter, softened
1/2 cup sugar (I might cut back on this next time, just a little bit)
2 large egg whites
1/3 cup cake flour (I used regular)
1/2 tsp vanilla extract
2 tsp lemon zest, finely chopped
2 tsp lime zest, finely chopped

Instructions:
Preheat oven to 350ºF. Place parchment paper on 2 cookie sheets.
Using an electric mixer, cream butter and sugar in a medium bowl until light and fluffy (Mine didn't exactly cream, but came together in a gritty-like mixture. Not a big deal). Add the egg whites and stir until just blended. Sift cake flour over butter mixture and mix with a spoon; fold in the vanilla.
Remove half of batter and place in a medium bowl; set aside. Fold lemon zest into one bowl and lime zest into other bowl. Or, you can be like me and just throw it all in there together. Yeah, I'm a rebel.
Drop heaping teaspoons of batter onto prepared cookie sheets leaving at least 3-inches between each cookie. When cookie sheet is full, flatten out cookies with back of a spoon so cookies look almost translucent and measure about 3-inches across. (You may have to do this in batches depending on the size of your cookie sheets.)
Bake until edges start to brown, about 4 to 5 minutes. Remove from oven and quickly transfer cookies to a cooling rack using a thin metal spatula. Yields 4 cookies per serving.

February 22, 2009

Tuscan Casserole

I think casserole is one of those generic terms that's used to describe a multitude of kitchen concoctions. I tended to shy away from casseroles because you never knew what was really in them. Paula Deen loooves making casseroles with cream of whatever soups, mayo and other heart-clogging delights. Shrimp and grits casserole anyone?

This dish is a WW recipe that I had seen a few times, but always skipped over because the online picture looked weird. Yes, I judge a recipe by the picture. So? Finally, I decided to try it after I made myself read through the ingredients. I already had ricotta in the fridge from a stuffed shells attempt (okay, but not blog-worthy) and I just had Alex pick up the other ingredients for me. It was easy to throw together and I baked it off before I had to go and staff a middle-school dance. Oy, that's a whole other story for another time.

The casserole was pretty good! It was a little salty, so I'll cut back on the amount next time, but I will definitely make this again. It's a good main meal for me, but wouldn't be filling enough for Alex. I think it would be a good brunch side-dish, also. In fact, I'm eating some leftovers right now. Sorry, did I get crumbs on you?

Ingredients:
1 15-oz can of cannellini beans, rinsed and drained
10-oz package of frozen chopped spinach, thawed and thoroughly drained
3/4 cup part-skim ricotta cheese
1/4 cup egg substitute
1.5 tsp salt (I would only use 1 tsp or less next time)
1/2 tsp pepper
2 tsp olive oil
1 medium onion, chopped
2 medium garlic cloves, chopped
8 oz sliced mushrooms
3 slices of reduced calorie bread, torn into small pieces (I found it easier to cube the bread)
2 TBS shredded parmesan cheese

Instructions:
Spray an 8x8 pan with cooking spray. Preheat the oven to 350.
Combine beans, spinach, egg, salt and pepper in a bowl and mix to combine. Heat a skillet over medium high heat, add oil, and saute the onions, garlic and mushrooms until the shrooms start to brown and soften, about 10 minutes. Try to let as much liquid as possible evaporate, otherwise you'll end up with a wet casserole!
Add the onion mixture to the bowl and stir to combine. Spoon everything into the baking dish and evenly top with the bread pieces. Sprinkle with parmesan cheese and bake until bread is toasted and spinach is warmed through, about 25 minutes. This serves 8 people, 2 points per serving.

January 2, 2009

Creamy Mexican Dip (WW)


Happy 2009 Everyone! I hope you had a wonderful New Years, whether you were out partying in Times Square, snuggled in at home in your jammies, or in the hospital (welcome to the world, Perseus!).

Alex and I spent the night with our wonderful group of friends, the same crowd we've been with since our days at Maryland, plus their significant others. We're so fortunate to have such a close and hilarious group, and we always have a great time together.

The hosts asked everyone to bring food/drink, so I scoured the Weight Watchers recipes for something I could eat without feeling guilty. I am a total sucker for crunchy things + dip combinations, so I decided to try this yummy-sounding recipe for Creamy Mexican Dip. It was really easy, although really messy, to make. Maybe that's just because I'm a messy cook. I served it with baked tortilla chips and placed it next to the veggie platter, so people could scoop it with celery, as well.

I really liked the way the tang of the Greek yogurt blended with the red onion and salsa, and the chunks of avocado and cilantro really made it flavorful. I think next time I'll blend in some chipotle peppers in adobo sauce to make it smokey and spicier.

Sorry for the cruddy picture. I totally forgot to take one and by the time I remembered, the bowl was pretty much scraped clean and not so pretty!

Ingredients:
1 cup plain fat-free Greek yogurt (could use plain regular)
1/2 cup salsa
3/4 cup avocado, diced (set aside some for garnish)
2/3 cup fresh cilantro, chopped (set some aside for garnish)
1 medium red onion, chopped (set some aside for garnish)
1/2 tsp cumin
1 tsp salt

Instructions:
In a medium bowl, blend together yogurt and salsa. Stir in remaining ingredients except garnishes. Cover and refrigerate up to 1 day.

When ready to serve, garnish with some chopped avocado, cilantro and red onion. 1 point per 1/4 cup serving.

Happy New Year!

December 30, 2008

Mo-rockin' Slow Cooker Stew


My flour, butter, sugar and baking sheets stared at me longingly as I skipped over them to grab my lonely slow cooker from the top cabinet. I have put a pause on baking the heavy, creamy, delicious goodies that one associates with the holidays because, well, to be honest, my pants are feeling a little snug. I worked really hard with WW to lose some of my poundage, so I don't want to sabotage myself. I'm also fighting against a medication whose biggest (ha!) known side-effect is weight gain, so that's a bit of an uphill battle.

This brings us to my delicious orange delight - WW Moroccan Slow Cooker Stew. My cooker and I have had a love/hate relationship. I love that I can toss in my raw ingredients and it will create a meal for me. I hate that it's an older model and only has 4 time settings: High 4 hour, High 6 hour, Low 10 hour and Low 8 hours. So when a recipe says to "Cook on low for 6 hours" what the heck am I supposed to do? And I have also learned that if your cooker isn't full to the top with the raw ingredients, it will burn, and then instead of coming home to a lovely pot of stewed chicken, you come home to a nasty burnt mess that takes 3 steel wool pads to scrub clean. So now it's a bit of an experiment. Sometimes I'll leave it on "warm" for the whole 8 hours and that works. For this recipe, I made it on a Sunday night and watched it closely.

I love the flavors of Moroccan cooking - hot and sweet and spicy. This stew is vegetarian, and honestly, I don't think I would want to add meat to it. The squash and beans make it very hearty and the spices warm your tummy. The original recipe called for baby carrots, also, but I didn't have them. After tasting the final product, I don't know if I would use them. It's sweet enough from the cinnamon and I think that carrots might make it too sweet.

Ingredients:
1 spray cooking spray
1 medium onion chopped
1 medium garlic clove, minced
1 medium butternut squash, peeled, seeded and cut into 1/2-inch cubes
1 cup baby carrots (I omitted)
1 cup canned crushed tomatoes
1/2 cup vegetable broth
1/4 tsp ground cinnamon
1/2 tsp ground cumin
1/2 tsp red pepper flakes
15 oz canned chickpeas, drained and rinsed
1/2 tsp table salt

Instructions:
Coat a small skillet with cooking spray. Add onion and garlic; sauté for 5 minutes.
Place squash in a 3-quart or larger slow cooker (crock pot). Add sauteed onion and garlic, carrots, tomatoes, broth, cinnamon, cumin and red pepper flakes. Cover and turn on to low heat; simmer for 6 hours.
Add chickpeas and salt. Stir, cover and heat for an additional 5 minutes. Yields about 1 1/3 cups per serving. Only 4 points per serving!

You can serve over cous-cous, but account for those points, too.
PS - Look for this recipe in Joelen's Chef Spotlight Dinners! http://joelens.blogspot.com/

December 15, 2008

Roasted and Stuffed Smothered Eggplant (freezer friendly!)

I apologize in advance for not having a picture. I finished this recipe up late last night and threw it into the fridge for Monday lunch & dinner. I recently started a part-time job, so now Alex and I both work late on Mondays. This recipe yields 4 servings (only 3 points each!) so we each took one for lunch and one for dinner.
It's really yummy, filling and healthy; however, I have yet to figure out a way to keep it looking pretty when I move it from the baking dish to the plate. By the time it gets out of the oven, the eggplant halves are so soft, they just fall apart. Delicious, but kinda messy. Let me know if you make this and can figure out a way to keep it looking nice!

Ingredients:
2 medium eggplant, sliced in half lengthwise
2 teaspoons olive oil
Cooking spray
1 large onion, chopped
1-2 carrots, chopped
2 red peppers, chopped
3 garlic cloves, chopped fine
3 portobello mushroom caps, chopped medium
parsley (2 TBS fresh or 1 TBS dried)
2 tsp dried tyme
salt and pepper - to taste
15-oz canned tomato sauce
Parmesan or Mozzeralla cheese (optional)

Instructions:
Preheat oven to 400 degrees.

Rub cut sides of eggplants with oil. Place on a nonstick baking sheet cut-sides up. Bake for 20 to 25 minutes (eggplant should not be cooked entirely through). Remove from oven and flip over with a spatula; let cool on baking sheet. Leave oven on.

Meanwhile, coat a large nonstick skillet with cooking spray and heat over medium-high heat. Add onions, carrot and peppers. Saute until soft and slightly browned, about 5 to 7 minutes. Add garlic and mushrooms. Increase heat to high and continue to saute until mushrooms soften and release their juices, about 5 to 7 minutes. Remove from heat and stir in parsley and thyme; season to taste with salt and pepper.

Scoop out flesh of cooled eggplant with a soup spoon, leaving about a 1/4-inch of eggplant flesh in skin. Coarsely chop flesh and add to mushroom mixture; mix well.

Fill each eggplant shell with about 1 1/2 cups of filling. Place stuffed eggplant shells in a nonstick 9- by 13-inch pan. Spoon 1/2 cup of tomato sauce over each stuffed eggplant shell. Top with optional cheese. Bake for 15 minutes, remove from oven and let cool.

Freezing and thawing instructions: Freeze each cooled eggplant half, topped with sauce, in individual containers. When ready to eat, thaw and microwave. Or, thaw and reheat for about 15 to 20 minutes in a 350 degrees oven.

This recipe yields 4 servings; one stuffed eggplant half per serving = 3 points.